Repair parts, guides and help by model or symptom
Start with your machine model, the symptom you are trying to fix, or the support path if you are not yet sure which part you need.
Shop by machine
Go straight to the machine family you are servicing.

Barista Touch / Impress (BES880/BES881)
Use the Barista Touch and Barista Express Impress path for milk-system issues, sensors, and error-code fixes.

Barista Express (BES870)
Go straight to the BES870 parts collection for brew-path leaks, solenoid faults, seals, and common service parts.

Dual Boiler (BES900/BES920)
Browse the main service kits, probes, seals, and repair guides for the Dual Boiler platform.

Oracle / Oracle Touch (BES980/BES990)
Go straight to the Oracle parts, service kits, and diagnostics content.
Shop by problem
Start with the symptom-led cards below, check the error code lookup if your machine shows a code, then move into the related blog guides, installation pages, and specific watch pages.
Error code lookup
Search Breville and Sage fault codes first when the machine gives you an ER code or warning.
Descale problems and pre-checks
Use the safe-descale series before pushing an older machine through a descale cycle.
Need help first?
Use the Virtual Technician first for quick part advice and simple troubleshooting. Use the links below when you need deeper help or a service centre.
Use the Virtual Technician for quick part advice and short troubleshooting questions. Use Extra Help when the problem needs more time and email back-and-forth to diagnose properly.
Popular
-
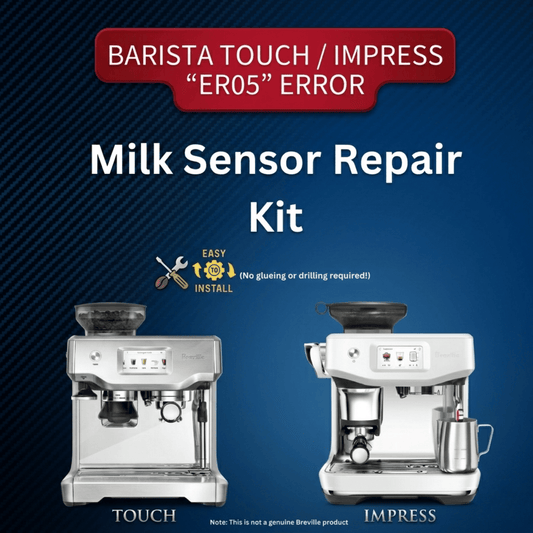
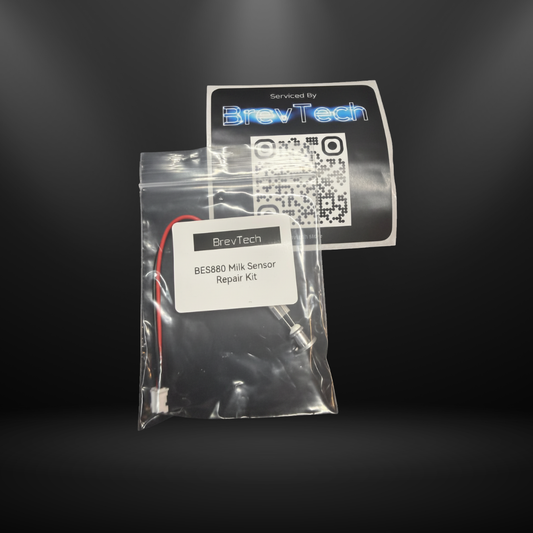
Milk Sensor Repair Kit for Barista Touch / Impress BES880/881 series (ER05, 06, 07, 08 Error repair)
Regular price $28.99 AUDRegular priceUnit price per -
2-Year Maintenance Kit for Dual Boiler / Oracle
Regular price $69.00 AUDRegular priceUnit price per -
Dual Boiler BES900/BES920 Survival Service Kit
Regular price $89.00 AUDRegular priceUnit price per -
Oracle BES980/BES990 Survival Service Kit
Regular price $99.00 AUDRegular priceUnit price per -
Pre-Sales Email Support inc Discount
Regular price $40.00 AUDRegular priceUnit price per -
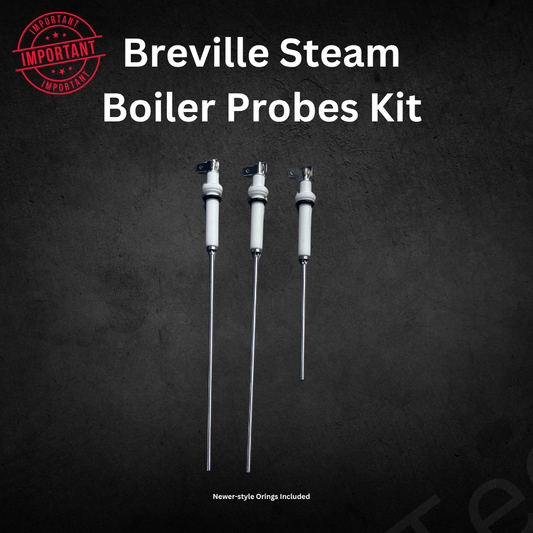
Breville Steam Probe Set of 3 for all Dual Boiler & Oracle models pre 2023
Regular price $59.00 AUDRegular priceUnit price per -
Premium O-Ring set for Breville Coffee Machines
Regular price $18.00 AUDRegular priceUnit price per -
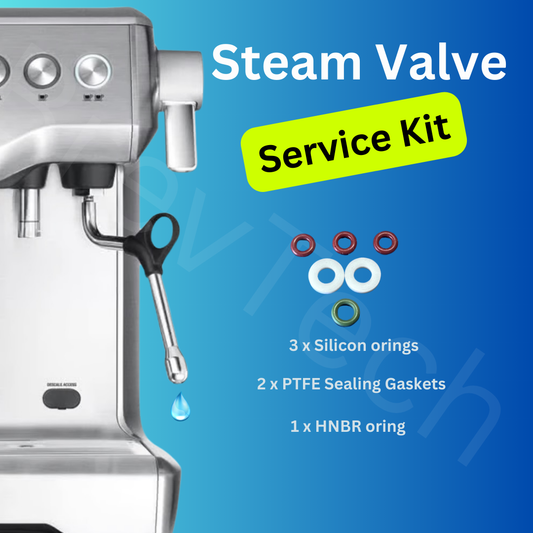
Steam Valve Service Kit for Dual Boiler BES900, BES920
Regular price $12.00 AUDRegular priceUnit price per -
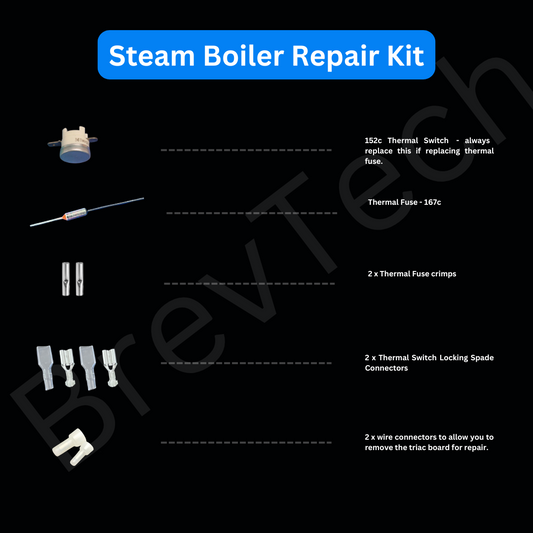
Steam Boiler Repair Kit for Breville BES900/920,BES980,BES990
Regular price $16.00 AUDRegular priceUnit price per -
Breville 800 Series Service Kit
Regular price $15.00 AUDRegular priceUnit price per


Recent Technical posts
View all-

Barista Touch / Pro no water or steam flow: rep...
If a Breville Barista Touch or Barista Pro has no water or steam flow, the ThermoJet boiler may be blocked with scale. This guide shows how to confirm water reaches...
Barista Touch / Pro no water or steam flow: rep...
If a Breville Barista Touch or Barista Pro has no water or steam flow, the ThermoJet boiler may be blocked with scale. This guide shows how to confirm water reaches...
-

Pro Service Tip: The Tricky Side Inlet O-Ring o...
The side inlet O-ring is one of the most important seals on the steam boiler because a leak here can drip directly onto the thermal switch below, causing the boiler...
Pro Service Tip: The Tricky Side Inlet O-Ring o...
The side inlet O-ring is one of the most important seals on the steam boiler because a leak here can drip directly onto the thermal switch below, causing the boiler...
-

Diagnosing Heat Problems on the BES920
A comprehensive guide to diagnosing heating malfunctions in the Breville BES920 Dual Boiler. This machine utilizes a Triple Heat System consisting of dedicated coffee and steam boilers alongside an actively heated...
Diagnosing Heat Problems on the BES920
A comprehensive guide to diagnosing heating malfunctions in the Breville BES920 Dual Boiler. This machine utilizes a Triple Heat System consisting of dedicated coffee and steam boilers alongside an actively heated...
-
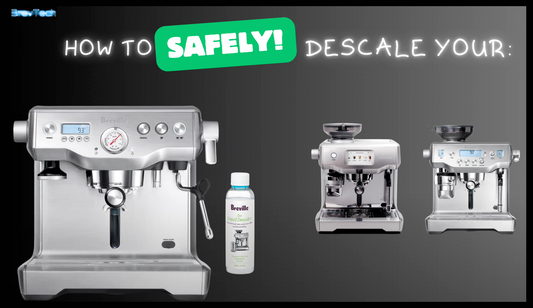
Safely Descale Your Breville Dual Boiler (BES92...
This safe descale guide is aimed at owners searching for Breville Dual Boiler descale problems, BES920 descale instructions, or Oracle no steam after descale issues and want to avoid turning...
Safely Descale Your Breville Dual Boiler (BES92...
This safe descale guide is aimed at owners searching for Breville Dual Boiler descale problems, BES920 descale instructions, or Oracle no steam after descale issues and want to avoid turning...


